
Transfer Pet Owner
Modby Jodek
Give your pets to other players
Type
Mod
CurseForge Downloads
2,165
CurseForge ID
1429164
Modrinth Downloads
11,459
Modrinth ID
7iTYUCAo
Last Updated
Jul 27, 2026
Description

[](https://discord.gg/z2n3qTzQY6)
[](https://www.youtube.com/@jodek)
[](https://github.com/jodeks-datapacks/transfer-pet-owner/issues)
[](https://ko-fi.com/jodek)
[](https://github.com/sponsors/Jodekq)
## How it works
**[1].** Get a Book & Quill
**[2].** Write the player name of the new owner in it (the player must be online)
**[3].** [below 1.21.5] While holding the Book & Quill, look at the pet you want to transfer and run /trigger transfer_pet_owner
**[3].** [1.21.5+] Sneak + look at the pet you want to transfer with the Book & Quill in your hand
**[4].** You're done!
## Guides

If something doesn't work, feel free to join the [discord server](https://discord.gg/z2n3qTzQY6) How to Install a Datapack in Singleplayer At the Creation of a World ### How to install a datapack in singleplayer 1. **Open Minecraft** Launch the game. 2. **Create a New World** Navigate to "More" and click on **"Data Packs"**. 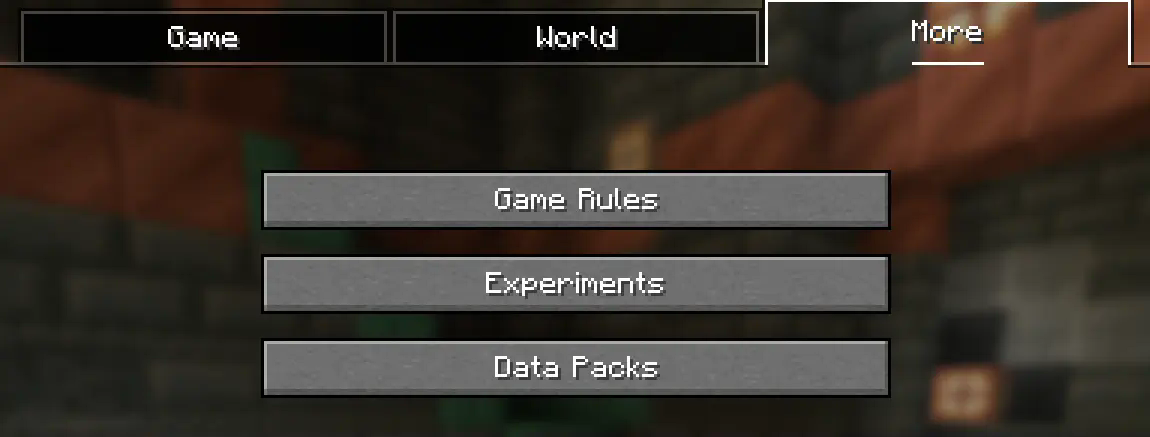 3. **Add the Datapack** Drag the datapack (a `.zip` file or directory) into the Minecraft window. - A confirmation screen will appear. Click **"Yes"**. 4. **Activate the Datapack** Move the datapack to the right-hand side of the screen by clicking the triangle on its icon (visible when hovering over it). 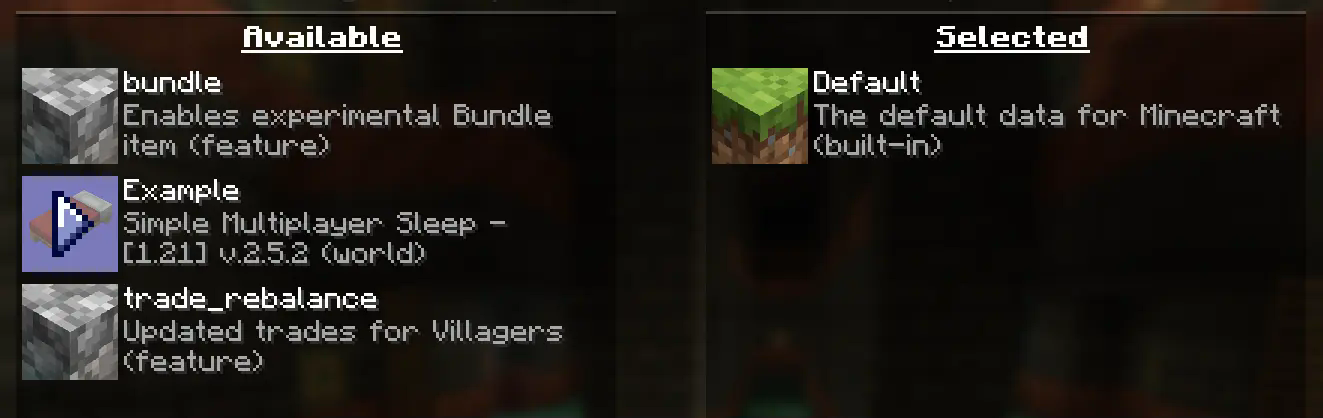 5. **Complete World Creation** - Click **"Done"** at the bottom of the screen. - Continue creating your world and click **"Create New World"**. --- ### ⚠️ IMPORTANT ⚠️ The datapack only works if cheats are enabled. You can verify the datapack is active by typing: `/datapack list enabled` This command should list an entry named `[file/]`. In an Existing World ### How to Install a Datapack in an Existing Singleplayer World 1. **Open Minecraft** Launch the game. 2. **Select Your World** - Choose the world you want to install the datapack for. - Click **"Edit"**, then **"Open World Folder"**. 3. **Add the Datapack** - Open the folder named `datapacks`. - Place the datapack into this folder. It should be a `.zip` file or a directory. 4. **Reload the World** - If you are in the world during installation, type `/reload` in the chat or press **F3 + T** to reload resources. *(Make sure cheats are enabled.)* --- ### ⚠️ IMPORTANT ⚠️ The datapack only works if cheats are enabled. You can verify the datapack is active by typing: `/datapack list enabled` How to Enable Cheats Permanently After World Creation If you encounter this issue, here is a step by step guide on how to enable Cheats/Admincommands permanently after you have already created a Minecraft world. ⚠️ **Before you begin, you should save and backup your world in case something goes wrong.** (I will not take any responsibility for any corrupt worlds. Do this at your own risk!) But don't worry this works without any problems. If you don't want to change this permanently check out [this guide](#). ### 1. You need [NBTExplorer](https://github.com/jaquadro/NBTExplorer/releases/tag/v2.8.0-win) > NBTExplorer is an open-source NBT editor for all common sources of NBT data. It's mainly intended for editing Minecraft game data. ### 2. Open NBTExplorer and open your Minecraft world, where you want to enable Cheats/Admincommands.  ### 3. Navigate to: - `` - `level.dat` - `Data` - `allowCommands`  ### 4. Click on **"Edit Tag Value"**  ### 5. Change the Value from `0` to `1` and click **"OK"**  ### 6. Now click on **"Save All Modified Tags"**  That's it. You are done. You can now join your world and check if you have permission to change your `gamemode`, for example. How to Enable Cheats Temporarily After World Creation ### Enabling Cheats Temporarily After World Creation If you encounter this issue, here is a step-by-step guide on how to enable Cheats/Admin commands temporarily after you have already created a Minecraft world. 1. **Join Your World** Open your single-player world and press "Escape". 2. **Open to LAN** Click on **"Open to LAN"**. 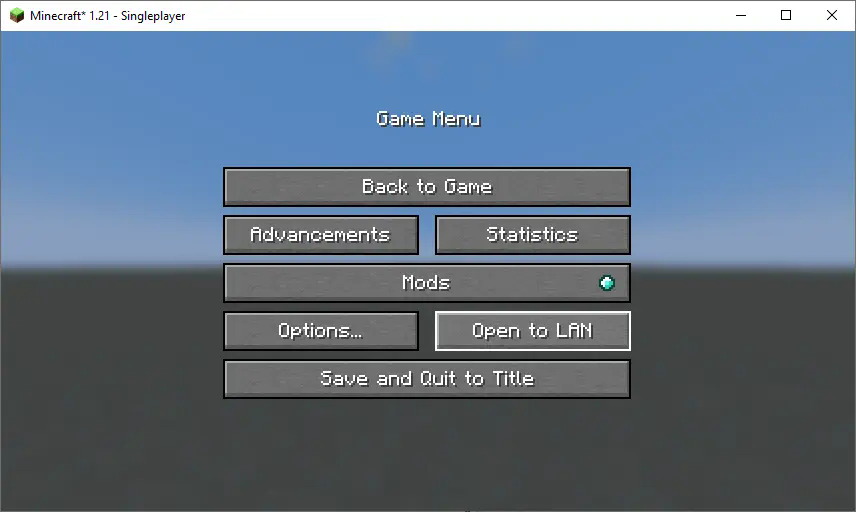 3. **Allow Commands** Set **"Allow Commands"** to **ON**. 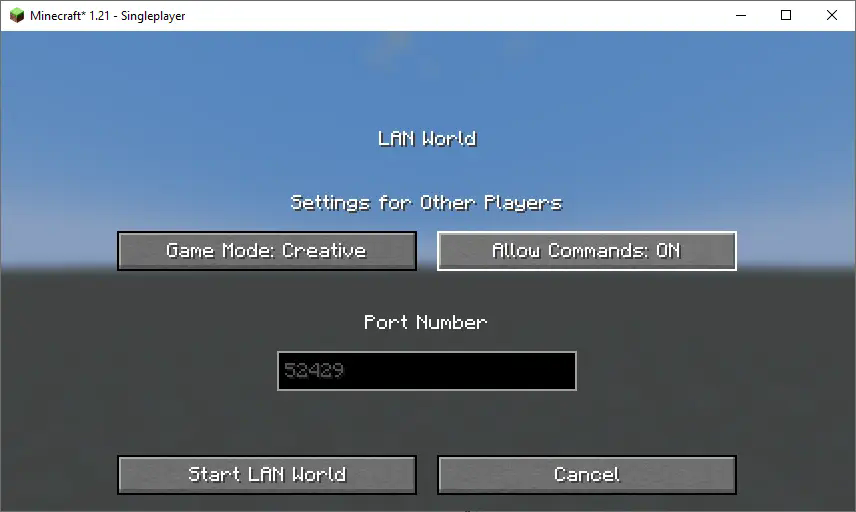 4. **Start LAN World** Click **"Start LAN World"** to apply the changes. 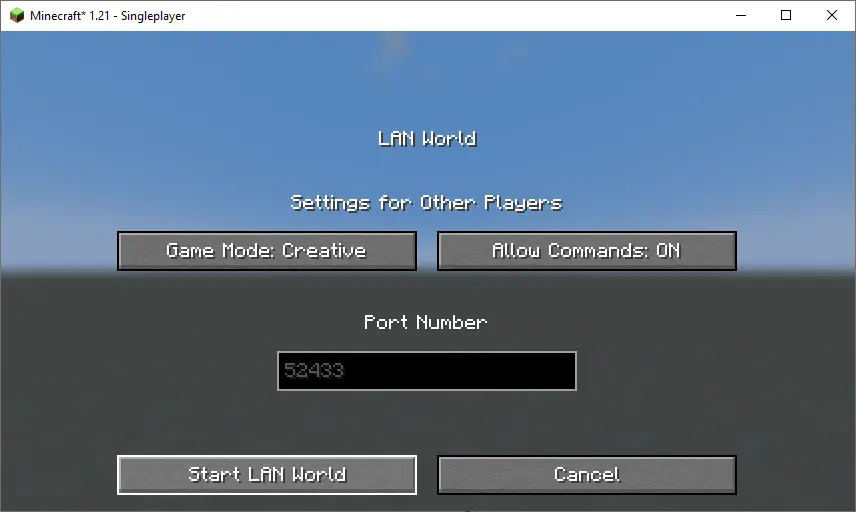 Now, you should be able to use commands like changing your gamemode. Keep in mind that this is only temporary and will need to be done every time you join the world. How to Install a Datapack in Multiplayer ### How to Install a Datapack in Multiplayer 1. **Open Your Server Folder** Navigate to your server folder, then open the folder for the world you wish to install the datapack in (default: `world`). 2. **Add the Datapack** - The datapack should be a `.zip` file. - Place the datapack into a folder named `datapacks` inside the world folder. 3. **Reload the Server** - Type `/reload` from the console or as a level 3 operator if the server was running during the installation. How to Uninstall a Datapack ### How to Uninstall a Datapack from Your Singleplayer World or Server 1. **Run the Uninstall Command** For my datapacks, run the command: `/function datapack_name:uninstall` 2. **Delete the Datapack** - Delete the datapack from the folder you placed it in. - Alternatively, you can run: `/datapack disable [file/your data pack file/directory name]` 3. **Reload the World or Server** After deleting or disabling the datapack, run: `/reload` How to Install a Mod on a Minecraft Server ### Step-by-Step Guide to Installing a Mod on a Minecraft Server 1. **Download the Mod** - Make sure to download the **correct version** of the Mod that matches your server's Minecraft version. - **Important:** The mod file should be a `.jar` file. 2. **Ensure No Datapacks or Other Mods Conflict** - Do not have both a datapack and a mod installed at the same time, as they may conflict. - Only install one or the other, depending on your server's setup. 3. **Locate the Mods Folder** - Open your server's root directory. - Inside this directory, find the folder named `mods`. - If the `mods` folder doesn't exist, create one. 4. **Install the Mod** - Paste the downloaded `.jar` file for the Mod into the `mods` folder. 5. **Restart the Server** - After adding the Mod to the `mods` folder, restart your Minecraft server for the mod to be activated. 6. **Verify Mod Installation** - Once the server has restarted, join the server and check if the Mod is working. - You can use `/mods` or a similar command (depending on the mod) to see if the Mod has been successfully loaded. ### Additional Tips - **Backup Your Server:** Always create a backup before installing the Mod to avoid data loss in case something goes wrong. - **Ensure Mod Compatibility:** Check that the Mod is compatible with your Minecraft server version and any other mods you have installed.
If something doesn't work, feel free to join the [discord server](https://discord.gg/z2n3qTzQY6) How to Install a Datapack in Singleplayer At the Creation of a World ### How to install a datapack in singleplayer 1. **Open Minecraft** Launch the game. 2. **Create a New World** Navigate to "More" and click on **"Data Packs"**.  3. **Add the Datapack** Drag the datapack (a `.zip` file or directory) into the Minecraft window. - A confirmation screen will appear. Click **"Yes"**. 4. **Activate the Datapack** Move the datapack to the right-hand side of the screen by clicking the triangle on its icon (visible when hovering over it).  5. **Complete World Creation** - Click **"Done"** at the bottom of the screen. - Continue creating your world and click **"Create New World"**. --- ### ⚠️ IMPORTANT ⚠️ The datapack only works if cheats are enabled. You can verify the datapack is active by typing: `/datapack list enabled` This command should list an entry named `[file/]`. In an Existing World ### How to Install a Datapack in an Existing Singleplayer World 1. **Open Minecraft** Launch the game. 2. **Select Your World** - Choose the world you want to install the datapack for. - Click **"Edit"**, then **"Open World Folder"**. 3. **Add the Datapack** - Open the folder named `datapacks`. - Place the datapack into this folder. It should be a `.zip` file or a directory. 4. **Reload the World** - If you are in the world during installation, type `/reload` in the chat or press **F3 + T** to reload resources. *(Make sure cheats are enabled.)* --- ### ⚠️ IMPORTANT ⚠️ The datapack only works if cheats are enabled. You can verify the datapack is active by typing: `/datapack list enabled` How to Enable Cheats Permanently After World Creation If you encounter this issue, here is a step by step guide on how to enable Cheats/Admincommands permanently after you have already created a Minecraft world. ⚠️ **Before you begin, you should save and backup your world in case something goes wrong.** (I will not take any responsibility for any corrupt worlds. Do this at your own risk!) But don't worry this works without any problems. If you don't want to change this permanently check out [this guide](#). ### 1. You need [NBTExplorer](https://github.com/jaquadro/NBTExplorer/releases/tag/v2.8.0-win) > NBTExplorer is an open-source NBT editor for all common sources of NBT data. It's mainly intended for editing Minecraft game data. ### 2. Open NBTExplorer and open your Minecraft world, where you want to enable Cheats/Admincommands.  ### 3. Navigate to: - `` - `level.dat` - `Data` - `allowCommands`  ### 4. Click on **"Edit Tag Value"**  ### 5. Change the Value from `0` to `1` and click **"OK"**  ### 6. Now click on **"Save All Modified Tags"**  That's it. You are done. You can now join your world and check if you have permission to change your `gamemode`, for example. How to Enable Cheats Temporarily After World Creation ### Enabling Cheats Temporarily After World Creation If you encounter this issue, here is a step-by-step guide on how to enable Cheats/Admin commands temporarily after you have already created a Minecraft world. 1. **Join Your World** Open your single-player world and press "Escape". 2. **Open to LAN** Click on **"Open to LAN"**.  3. **Allow Commands** Set **"Allow Commands"** to **ON**.  4. **Start LAN World** Click **"Start LAN World"** to apply the changes.  Now, you should be able to use commands like changing your gamemode. Keep in mind that this is only temporary and will need to be done every time you join the world. How to Install a Datapack in Multiplayer ### How to Install a Datapack in Multiplayer 1. **Open Your Server Folder** Navigate to your server folder, then open the folder for the world you wish to install the datapack in (default: `world`). 2. **Add the Datapack** - The datapack should be a `.zip` file. - Place the datapack into a folder named `datapacks` inside the world folder. 3. **Reload the Server** - Type `/reload` from the console or as a level 3 operator if the server was running during the installation. How to Uninstall a Datapack ### How to Uninstall a Datapack from Your Singleplayer World or Server 1. **Run the Uninstall Command** For my datapacks, run the command: `/function datapack_name:uninstall` 2. **Delete the Datapack** - Delete the datapack from the folder you placed it in. - Alternatively, you can run: `/datapack disable [file/your data pack file/directory name]` 3. **Reload the World or Server** After deleting or disabling the datapack, run: `/reload` How to Install a Mod on a Minecraft Server ### Step-by-Step Guide to Installing a Mod on a Minecraft Server 1. **Download the Mod** - Make sure to download the **correct version** of the Mod that matches your server's Minecraft version. - **Important:** The mod file should be a `.jar` file. 2. **Ensure No Datapacks or Other Mods Conflict** - Do not have both a datapack and a mod installed at the same time, as they may conflict. - Only install one or the other, depending on your server's setup. 3. **Locate the Mods Folder** - Open your server's root directory. - Inside this directory, find the folder named `mods`. - If the `mods` folder doesn't exist, create one. 4. **Install the Mod** - Paste the downloaded `.jar` file for the Mod into the `mods` folder. 5. **Restart the Server** - After adding the Mod to the `mods` folder, restart your Minecraft server for the mod to be activated. 6. **Verify Mod Installation** - Once the server has restarted, join the server and check if the Mod is working. - You can use `/mods` or a similar command (depending on the mod) to see if the Mod has been successfully loaded. ### Additional Tips - **Backup Your Server:** Always create a backup before installing the Mod to avoid data loss in case something goes wrong. - **Ensure Mod Compatibility:** Check that the Mod is compatible with your Minecraft server version and any other mods you have installed.
Compatibility
Mod Loaders
Datapack
Fabric
Forge
Neoforge
Quilt
Game Versions
1.21
1.21.1
1.21.2
1.21.3
1.21.4
1.21.5
1.21.6
1.21.7
1.21.8
1.21.9
+6 more
Similar Mods
Immersive Vehicles Trin Emergency Pack
vehicle pack for Immersive Vehicles
Mod
136,236

Hitmarker Forge
Adds the hitmarker from the CoD games, complete with sound
Mod
136,202
![Assorted Lib [Forge/Fabric]](https://media.forgecdn.net/avatars/805/955/638173382214458076.png)
Assorted Lib [Forge/Fabric]
The library mod that all of the other assorted mods rely on.
Mod
136,196

Shutter Up!
A mod that adds classy decorative shutters to your world!
Mod
136,180
Farmer's Pizzeria
Pizza addon for Farmer's Delight and Brewin' And Chewin'
Mod
136,170

Shader fixer
A mod that adds more compatibility with shaders (1.7.10).
Mod
136,161